Three steps to launch a streaming-grade clinic experience.
SMS OTP-first onboarding means your clinic is live in minutes, not weeks. No forms, no paperwork, no waiting for approvals.
The process
From signup to go-live in three steps.
Each step is designed to get you closer to a fully operational, automated clinic platform.
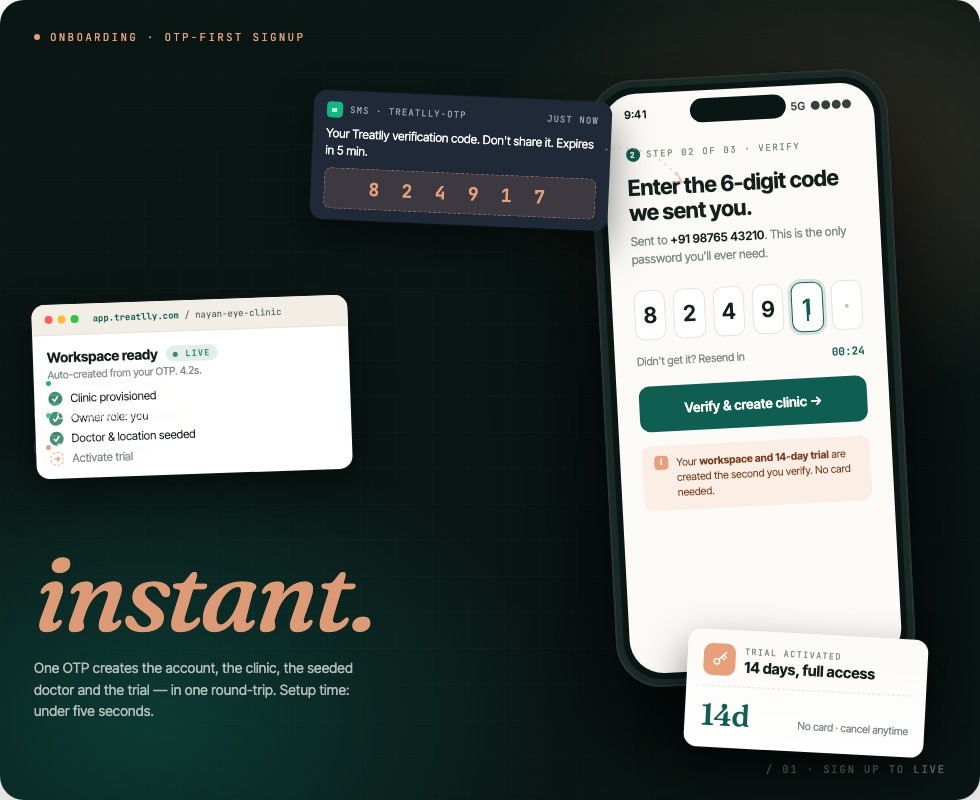
SMS OTP signup → clinic setup
Sign up with a single SMS OTP. Your clinic workspace is set up automatically, and you are guided straight to billing to activate your 14-day free trial.
- OTP verified signup
- Clinic created automatically
- 14-day trial activation
Slot rules, doctors, and your storefront
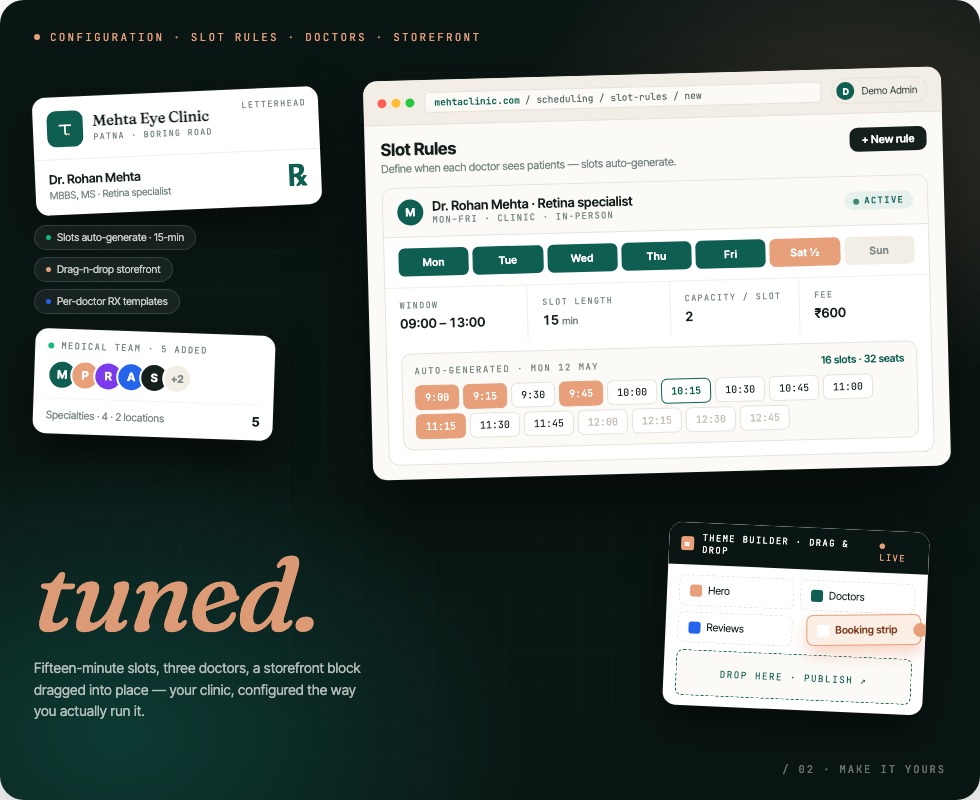
Configure slot rules for each doctor, add your medical team, and publish your patient-facing storefront using the drag-n-drop theme builder.
- Slot generation & regeneration
- Drag-n-drop theme builder
- Prescription builder per doctor
Automate reschedules, cancellations, and accounting
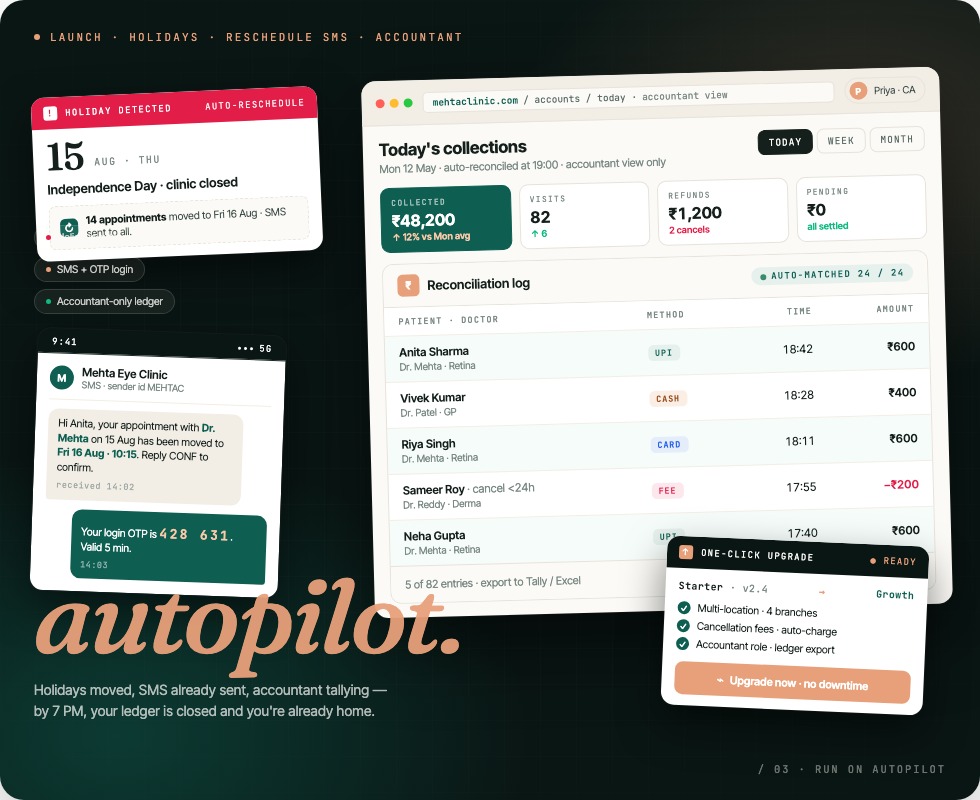
Holiday management, auto-reschedule SMS, cancellation fees, and dedicated accountant dashboards keep your clinic running on autopilot.
- SMS notifications + OTP login
- Accountant-only reconciliation
- One-click upgrades
What each step actually involves
The three steps above are the shape of the process. Below is the detail — what you are actually asked to decide at each stage, and which decisions are worth slowing down for.
Step 1 — Onboarding: what gets created for you
Signup is an SMS OTP against your mobile number. There is no application form to fill in, no document upload, and no approval queue — the number is verified and your clinic workspace is created immediately. That workspace is yours alone: your data sits in its own tenant, separated from every other clinic on the platform, which is what makes it safe to give your receptionist a login on day one.
You are then routed into billing to activate the 14-day trial. No card is required to start. The only thing you need to decide at this stage is your clinic's name and the subdomain patients will eventually use, because those appear on the storefront — everything else can be changed later.
Step 2 — Configuration: the part that deserves your attention
This is the step where a rushed decision costs you later, so it is worth being deliberate. You configure three things.
Slot rules, per doctor. You describe a doctor's recurring week rather than typing out individual appointments: which days they consult, the sessions within those days, how long a consultation takes, and how many patients each session can hold. The critical setting is the online quota — how many of those seats the internet is allowed to book. Set it to everything and a fully booked morning leaves your front desk unable to fit a walk-in; set it too low and the storefront looks empty. Most clinics start conservatively and raise it once they trust the flow. A scheduler then generates real bookable slots forward from the rule, and regenerates them whenever the rule changes, leaving already-booked patients untouched.
Your medical team. Each doctor gets their own profile, consulting schedule and fee. Staff are added with a role rather than a shared password — reception, doctor, accountant and tenant admin each see a different application. Deciding who is an accountant matters more than it sounds: that is the role that can see settlement and refund detail.
Your storefront. The drag-and-drop builder controls the marketing sections of your patient-facing site — hero, departments, doctors, contact. The booking flow itself is a shared component, so it stays correct no matter how you restyle around it. Each doctor can also have their own prescription layout, so what prints matches what they already sign by hand. The full feature list sets out exactly what the builder does and does not control.
Step 3 — Launch: what runs without you
Once patients are booking, most of the day-to-day is automatic. Marking a holiday removes the affected slots and flags the patients on them for reschedule rather than silently cancelling. Reschedules and cancellations notify the patient by SMS. If you charge a cancellation fee, the policy is applied consistently instead of being argued at the counter.
Reconciliation is where clinics usually discover whether their software is honest. Collections, refunds and settlements are visible to whoever holds the accountant role, without giving that person access to clinical records. Because there is no per-patient commission, the money arithmetic stays simple: what the patient paid, minus the payment gateway's own processing fee, is what reaches you. The pricing page sets out the flat monthly plans and which add-ons are billed separately.
How long it realistically takes
Signup is minutes. Configuration is an afternoon if you know your doctors' schedules, and considerably longer if you have to go and ask them — which is the usual delay. Going live is the easy part. If you would like someone to look over your slot rules before you publish, book a walkthrough; that one review prevents most of the problems clinics hit in their first fortnight.
Ready to onboard?
Start your 14-day free trial — SMS OTP signup in minutes.
Create your tenant. Configure slots. Publish storefront. Go live.